- Published on
Setting up self hosted agent i.e. configuring cloud VM for Azure Devops Pipelines
- Authors

- Name
- Rahul Neelakantan
Why would someone what to create a self-hosted agent for Azure Pipelines?
There can be many reasons, but cost and customization are the primary reasons.
Let's say you have created a new organization in Azure DevOps; then you'll have the following:
- 1 free self-hosted agent
- 1 free Microsoft-hosted agent (But it would only have 1800 mins of runtime)
Microsoft agent only has 30 hours. So if you exceed your limit, your pipelines will be stuck infinitely for the next month until you get your credits. Or you can buy 1 Microsoft-hosted pipeline, which would cost about 50 dollars more.
For this case, you can use 1 free self-hosted pipeline agent. One more advantage is that the pipelines should be faster as Microsoft normally would decommission or delete the VM used to run the pipeline, so the startup time of the pipeline would be slow for Microsoft-hosted ones.
How to set up a self-hosted agent pool for running your pipelines in Azure
First, you'll need to create an agent pool. An agent pool is like a group of agents you can call out when configuring your pipelines.
To create an agent pool, follow the below steps.
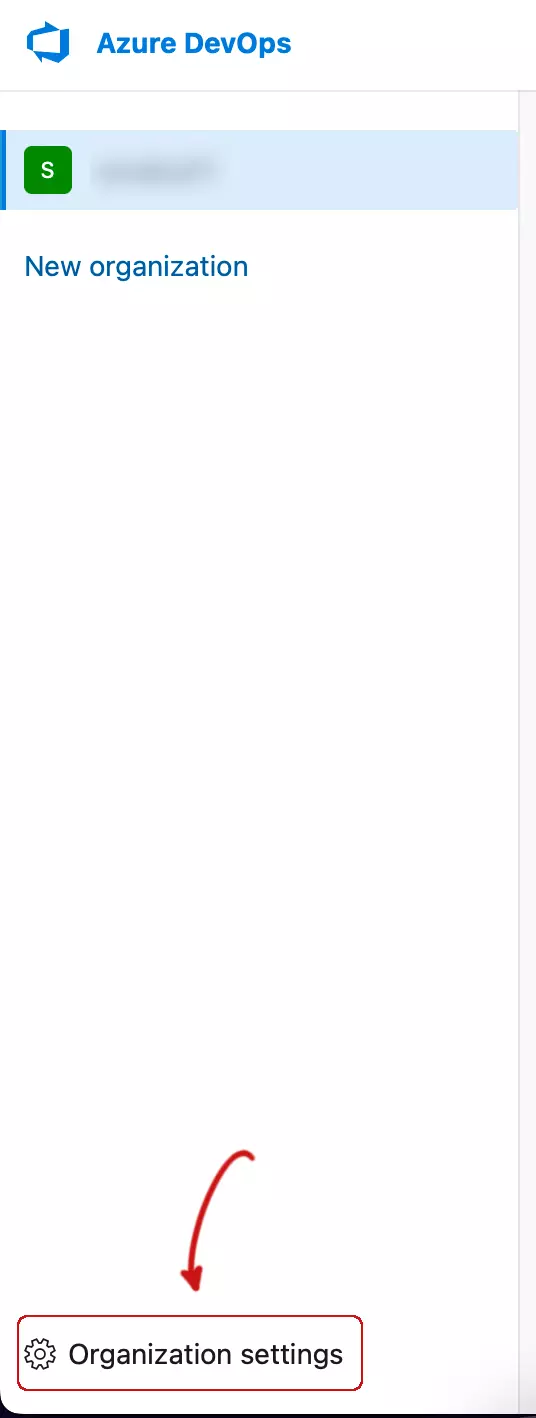
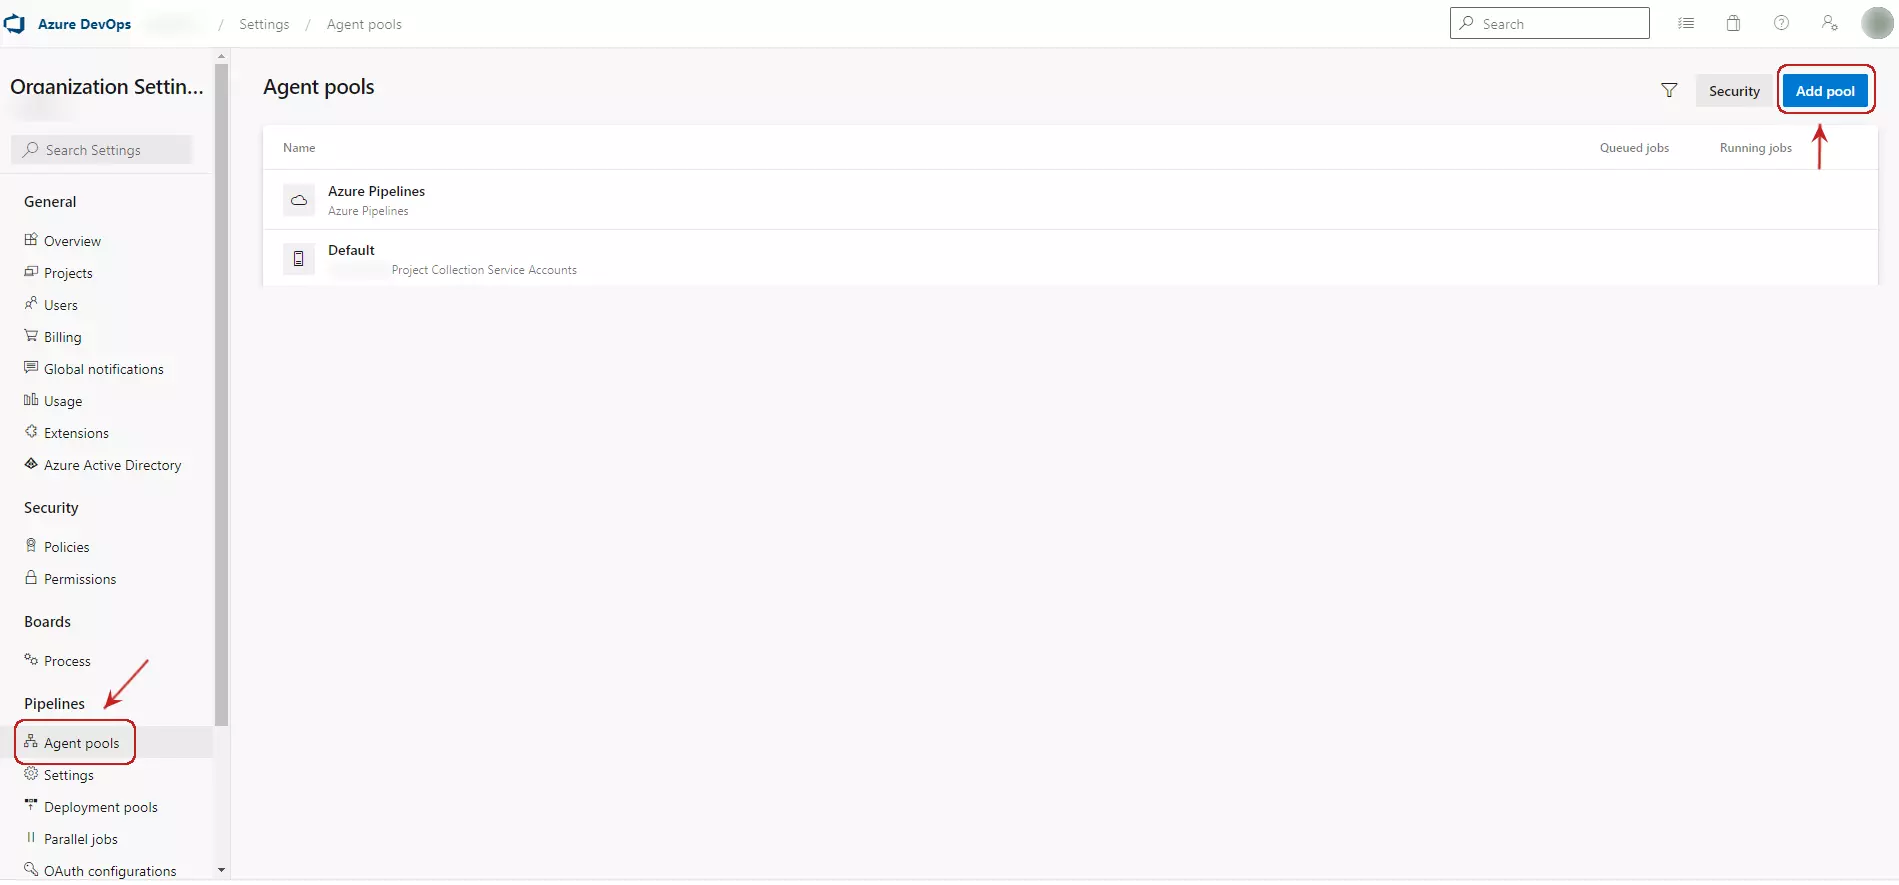
Go to your Azure DevOps organization URL and then click on Organization settings, then go to Agent pools where you can click on Add pool and select Self-hosted and provide a name.
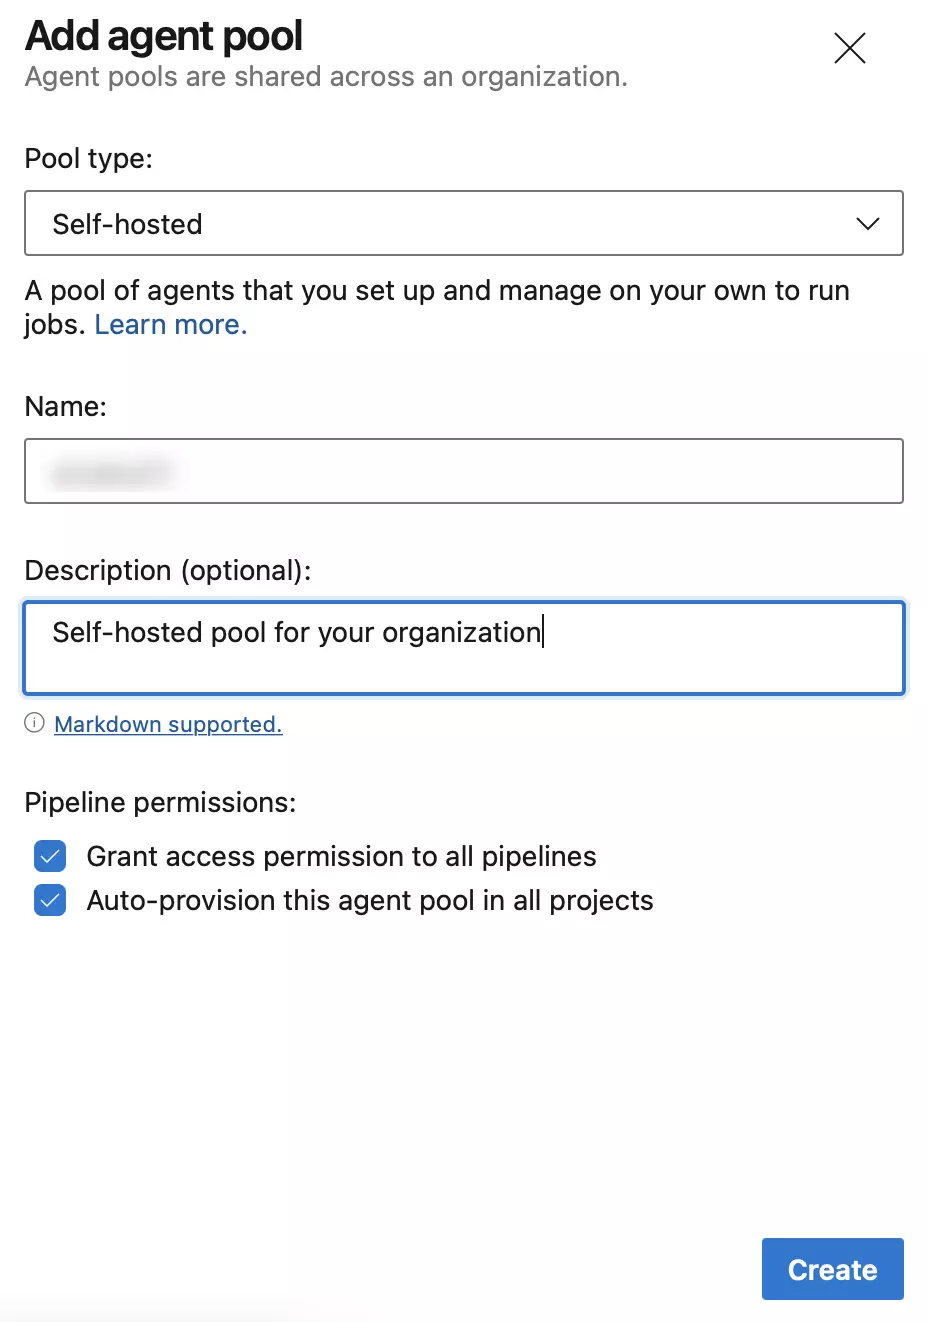
This will create a new Self-hosted pool which can now be used by your pipelines.

Once the pipeline pool has been created, you'll need to add a new agent to this pool.
The below section will explain how you can set up a Linux VM in the cloud as an Agent to Azure Agent Pool.
How to configure Linux VM as an agent to your new agent pool in Azure DevOps
You have a Linux machine in the cloud or on-premises that you want to make as an agent. Please ensure you've admin access to your VM because you'll need to have it for installation & configuration. Afterward, the agent can run on a regular user.
The agent needs a username. Therefore, creating a new or existing user for the agent is always better. Below are the steps needed to create a new agent user. First, SSH into your VM, then follow the below steps.
sudo su                    # Elevate to root user
adduser <Agent Username>   # Create user agent
exit                       # Exit from root user
su <Agent Username>        # Switch to agent user
cd ~                       # Move to agent's home
Now that you've configured your agent user. Let us start downloading the installation file to your agent's home directory. We can even click on add agent in your agent pool which will provide you the latest installation file.
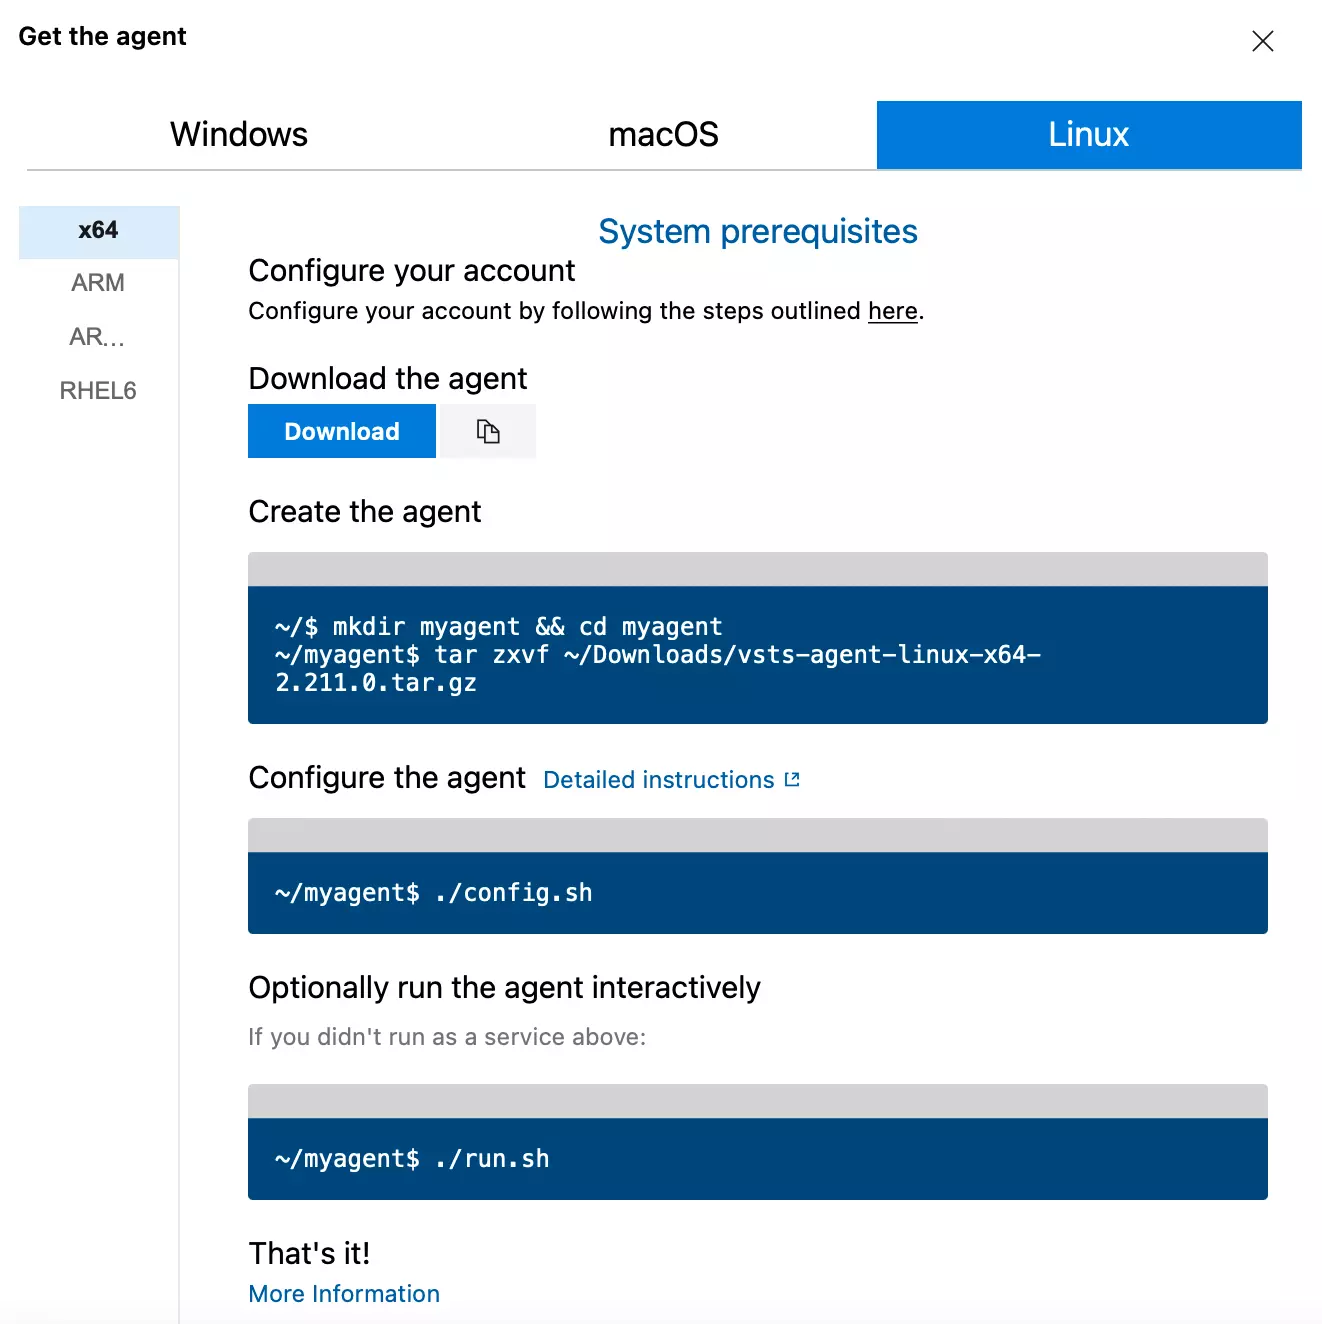
# Download the installation file with wget
wget https://vstsagentpackage.azureedge.net/agent/2.211.0/vsts-agent-linux-x64-2.211.0.tar.gz

# Create myagent folder and extract the file to the folder
mkdir myagent && cd myagent && tar zxvf ~/vsts-agent-linux-x64-2.211.0.tar.gz
Before going to the next step, you must create a personal access token that only has access to manage agent pools. You'll need to provide this token when you're configuring your agent.
Click on the user settings, and you should be able to see Personal access tokens.
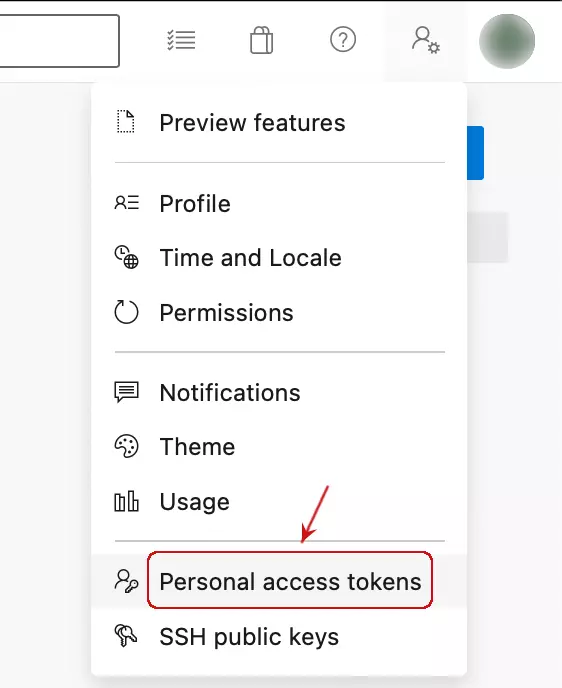
Now only give permissions for managing agent pools.
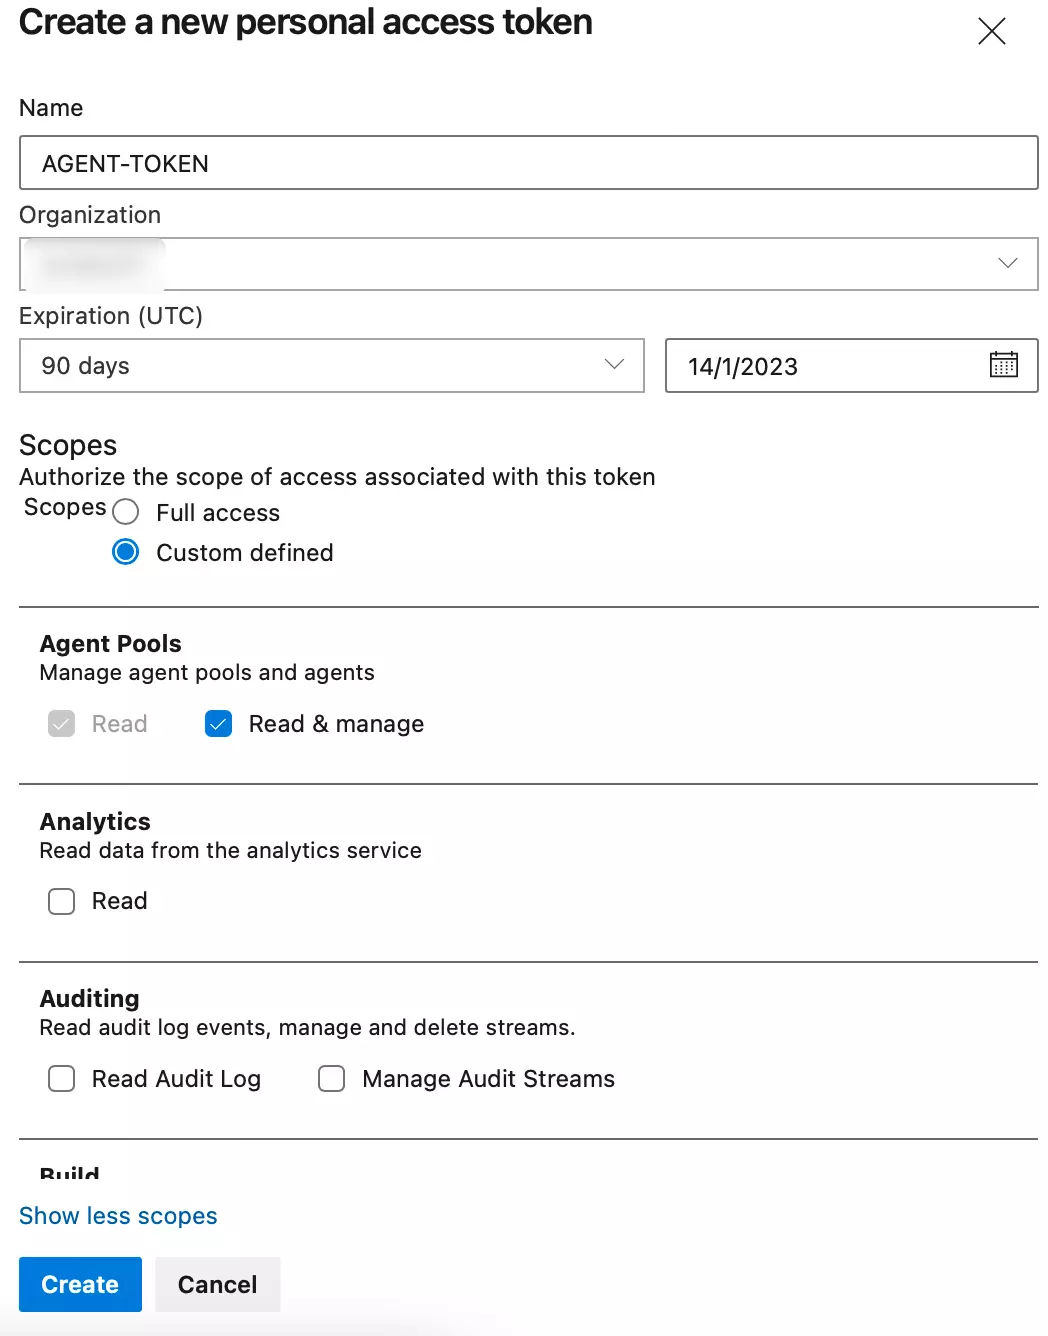
Once this is done, please copy the token and save it somewhere because you'll need in the below step where you'll need to provide a personal access token.
# Configure your agent to connect to the azure agent pool
./config.sh

  ___                      ______ _            _ _
 / _ \                     | ___ (_)          | (_)
/ /_\ \_____   _ _ __ ___  | |_/ /_ _ __   ___| |_ _ __   ___  ___
|  _  |_  / | | | '__/ _ \ |  __/| | '_ \ / _ \ | | '_ \ / _ \/ __|
| | | |/ /| |_| | | |  __/ | |   | | |_) |  __/ | | | | |  __/\__ \
\_| |_/___|\__,_|_|  \___| \_|   |_| .__/ \___|_|_|_| |_|\___||___/
                                   | |
        agent v2.211.0             |_|          (commit 5f9e5b4)


>> End User License Agreements:

Building sources from a TFVC repository requires accepting the Team Explorer Everywhere End User License Agreement. This step is not required for building sources from Git repositories.

A copy of the Team Explorer Everywhere license agreement can be found at:
  /home/agent/myagent/license.html

Enter (Y/N) Accept the Team Explorer Everywhere license agreement now? (press enter for N) > Y

>> Connect:

Enter server URL > https://dev.azure.com/<your devops organisation name>
Enter authentication type (press enter for PAT) >
Enter personal access token > ****************************************************
Connecting to server ...

>> Register Agent:

Enter agent pool (press enter for default) > <agent pool name>
Enter agent name (press enter for snrahul11) > <agent name>
Scanning for tool capabilities.
Connecting to the server.
Successfully added the agent
Testing agent connection.
Enter work folder (press enter for _work) >
2022-10-16 14:17:03Z: Settings Saved.
Now you run the following command to test if your agent is connected to the pool.
# This will interactively run the agent; it is only for testing if everything is working fine.
./run.sh
Now when you click on your agent pool and look for agents, you'll see that the agent is online.

Congratulations, now you've set up your self-hosted agent, from which you can run your pipelines. But please note that this is just a basic configuration. Many configurations are needed for the self-agent, like Docker, Workspace cleanup, Service, etc.
Install Docker in Ubuntu for a self agent
Most of the pipelines now need Docker somehow, so it's best to install Docker in the agent VM, or most of your pipelines wouldn't run. To install Docker, please follow the below steps; I've documented each and every step clearly.
# Download the install script from Docker
curl -fsSL https://get.docker.com -o get-docker.sh

# This will do a dry run i.e., show the steps needed to install, which you can view.
DRY_RUN=1 sh ./get-docker.sh

# Will install Docker with sudo command
sudo sh get-docker.sh

# Needed to install uidmap
sudo sh -eux <<EOF
# Install newuidmap & newgidmap binaries
apt-get install -y uidmap
EOF

# This is needed for the Docker extension in VSCode to work in SSH
sudo chmod o+rw /var/run/docker.sock
Now you've installed Docker, and you can also run docker with your Azure pipelines.
Providing agent user access to Docker
Even if you install Docker, you can't run docker commands without sudo, this is because, by default, docker is not available for other users in the machine.
# Needed so that you can run the docker command as the local user
dockerd-rootless-setuptool.sh install
The above command should allow Docker to run for your agent user i.e., without sudo. Test if everything is working correctly by running the below command.
docker ps
If you're still facing issues with running the above command then you can follow the below steps, otherwise you can skip this section and go to the next section you'll need to disable global docker socket.
# Make sure to run with the user who can sudo; otherwise, you'll get the below error.
# $USER is not in the sudoers file. This incident will be reported.
sudo usermod -a -G sudo <Agent User>
sudo usermod -a -G docker <Agent User>

# Once it runs successfully, you can check if the user is found in the docker group.
grep 'docker' /etc/group

# this will add the following paths to your .bashrc
# If you're using some other terminal, change the ~/.bashrc
echo 'export PATH=/usr/bin:$PATH' >> ~/.bashrc
echo 'export DOCKER_HOST=unix:///run/user/1000/docker.sock' >> ~/.bashrc

# Reboot your system for the changes to take effect
reboot
# Or you force reboot by using the below command
# systemctl reboot -i
Setup your Azure Pipelines to use the new pool you've created
By adding the below line, you can set up your azure-pipelines.yaml file to use the self-hosted-agent pool.
pool:
  name: 'Agent Pool Name'
  vmImage: 'ubuntu-latest'
Now you need to commit, and you should see that your pipeline is running on the new agent you've set up.
Cleanup of workspace for subsequent jobs
As you're running the build from the self-hosted agent, the build directory will not get cleaned automatically. This is also one of the advantages of having a self-hosted agent; you can speed up your builds by not rebuilding everything. But if your project requires a clean workspace, you can update your pipeline YAML file with the configuration below.
- job: myJob
    workspace:
      clean: all # Options: outputs | resources | all
Now, your pipelines should work when you run them multiple times.
Run the agent as Service so that it can handle shutdown/restarts/disconnection, etc
When you just run ./run.sh, you notice that your agent is online and can run jobs, etc. But if your terminal closes or your VM shuts down. Then, you'll need to rerun this command to bring the agent back online. For this purpose, Azure has provided us with helper scripts that will enable us to create a service that will automatically start when your system boots up, etc.
# Create a service for connecting the agent to the pipeline
# Make sure to replace $USER with the intended user name if you don't want the current user to be run as an agent
sudo ./svc.sh install $USER

# Will start the Service
sudo ./svc.sh start

# Check if your agent is connected to the agent pool, display errors if any
sudo ./svc.sh status
Setup agent to run local Docker instead of running as admin user
Usually, when you run svc.sh, you'll need to run with sudo, so it connects to the docker socket of admin. Though it should be fine but when you project is NodeJS. You'll have a lot of dependencies with files that have a lot of different permissions like read only, etc.
When your agent runs some docker builds, the generated files become write-protected files, i.e., only the root can write/delete them. So your next build might fail at some point because your agent might be a regular user when it is not running docker jobs.
To resolve this issue, you can disable the system-wide docker socket and change the .env file in the myagent folder to the local user docker socket. This should resolve the issue of build failing due to permission problems.
# Disable system-wide docker socket
sudo systemctl disable --now docker.service docker.socket
Add the below commands to your .env file to configure environment variables for your agent to use when running.
PATH=/usr/bin:$PATH
DOCKER_HOST=unix:///run/user/1000/docker.sock
Once this is done, you can stop & restart your agent service for the environment variables to take effect.
./env.sh
sudo ./svc.sh stop
sudo ./svc.sh start
Conclusion
You've set up your self-hosted agent for azure pipelines; now you're ready to start working on your project and do commits which the new agent will take care of building it.
Hope this post helps you with the hurdles you encounter in building your agent pool.