
- Published on
Using Table Storage with Azure Functions with NodeJS
- Authors

- Name
- Rahul Neelakantan
This post assumes that you know how to work with Azure functions and have a storage account in Azure that you want to connect to your application.
What is Azure Tables?
Azure Table is a service that stores non-relational structured data (also known as structured NoSQL data) in the cloud, providing a key/attribute store with a schematic design. Because Table storage is schemaless, it's easy to adapt your data as the needs of your application evolve. As a result, access to Table storage data is fast and cost-effective for many applications. In addition, it is typically lower in cost than traditional SQL for similar volumes of data.
It's the cheapest solution for storing structured data in Azure. However, it doesn't support hierarchy and only supports basic types like string, boolean, integer, etc.
A record in Azure table storage is called an entity. There are two necessary fields for an entity. They are partitionKey and rowKey, which are mandatory.
partitionKey is the primary key where you can partition your data into buckets. For example, let's say you wanted to store employee information for each country. Then the country can be your partitionKey, and the employee name or id can be your rowKey, but make sure that partitionKey + rowKey is unique.
The timestamp field gets added automatically to the entity when it gets updated, so make sure to not add any custom field with the same name.
Adding Azure Tables library to Functions in NodeJS application
You'll need to add the following library to your NodeJS Azure Function project as, by default, Azure Functions doesn't support tables directly. There is an equivalent library for whichever service you want to access in Azure.
npm install @azure/data-tables
Once this is installed, you'll be able to see a line getting added to your dependencies like the one below.
{
  "name": "api",
  "version": "1.0.0",
  "description": "",
  "scripts": {
    "start": "func start",
    "test": "echo \"No tests yet...\""
  },
  "dependencies": {
    "@azure/data-tables": "^13.1.2"
  }
}
Note down your Access Keys for the Storage account where you're planning to add tables
You can do so by going to your azure portal, clicking on the storage account you're interested and clicking on Access Keys on the left side.

Add Azure Storage Account Connections Settings To Your local.settings.json like below.
{
  "IsEncrypted": false,
  "Values": {
    "STORAGE_ACCOUNT_NAME": "XXXXXXXXXX",
    "STORAGE_ACCOUNT_KEY": "XXXXXXXXXXXXXXXXXXXXXXXXXXXXXXXXXXXXXXXXXXXXXXXXXXXXXXXXXXXXXXXXXXXXXXXXXXXXXXXXXXXXXXXX",
    "FUNCTIONS_WORKER_RUNTIME": "node"
  }
}
You can connect to the storage account directly when you run your Azure functions locally.
Make sure you don't commit your local.settings.json, as these connection settings can be visible to all users who have access to your repository.
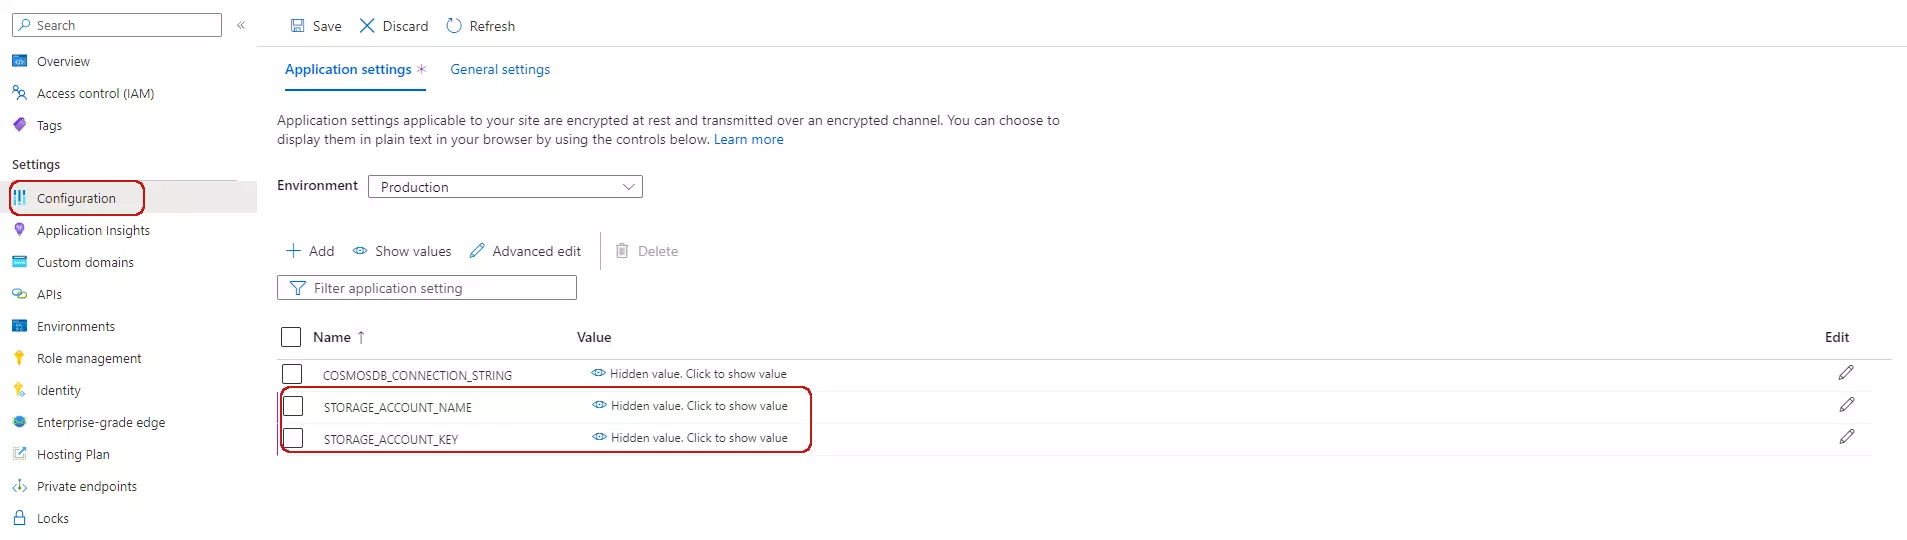
But this will only work locally. To connect your Azure Function App to your Storage account, you'll need to add these keys to your App configuration.
Now let's say you've created a new Azure Function in your Function App. Go to your index.js, and add the following lines.
const { TableClient, TableServiceClient, AzureNamedKeyCredential } = require('@azure/data-tables')

module.exports = async function (context, req) {
  const account = process.env.STORAGE_ACCOUNT_NAME
  const accountKey = process.env.STORAGE_ACCOUNT_KEY
  const credential = new AzureNamedKeyCredential(account, accountKey)
  const tablesEndpoint = `https://${account}.table.core.windows.net`
  const tableService = new TableServiceClient(tablesEndpoint, credential)
  const tableName = req.query.name || (req.body && req.body.name)

  await tableService.createTable(tableName)
  let tableClient = new TableClient(tablesEndpoint, tableName, credential)

  tableClient.createEntity({
    partitionKey: 'row',
    rowKey: 'Hello World',
  })

  context.res = {
    body: `Created Table ${tableClient.tableName}`,
  }
}
The above code will create a table if it's not existing in your storage account. So now you can use the tableClient for all your table operations.
You can find more information in the official link from microsoft.
Conclusion
This post provides a reasonable explanation for connecting your Azure Functions to your Azure Storage account. Let me know in the comments if any suggestions/improvements.