
- Published on
Guide to install Git
- Authors

- Name
- Rahul Neelakantan
This post will explain to you how to install Git on a Windows 10 machine and go through all the configuration options available while installing it. This will be helpful even if you’re on Mac/Linux, etc. Installing Git is straightforward, but there are some things that we need to be aware of, which I’ll be explaining in detail here.
Introduction
You can download Git from this link. It is an open-source project, so you don’t need to buy any licensing, etc. can be used for personal and commercial purposes. Git comes with its stock GUI, bash, and other 3rd party tools.
Once you click on the link, you’ll see the below page, where you’ll have to click on the highlighted download button.
Steps to install Git
Download executable from the website
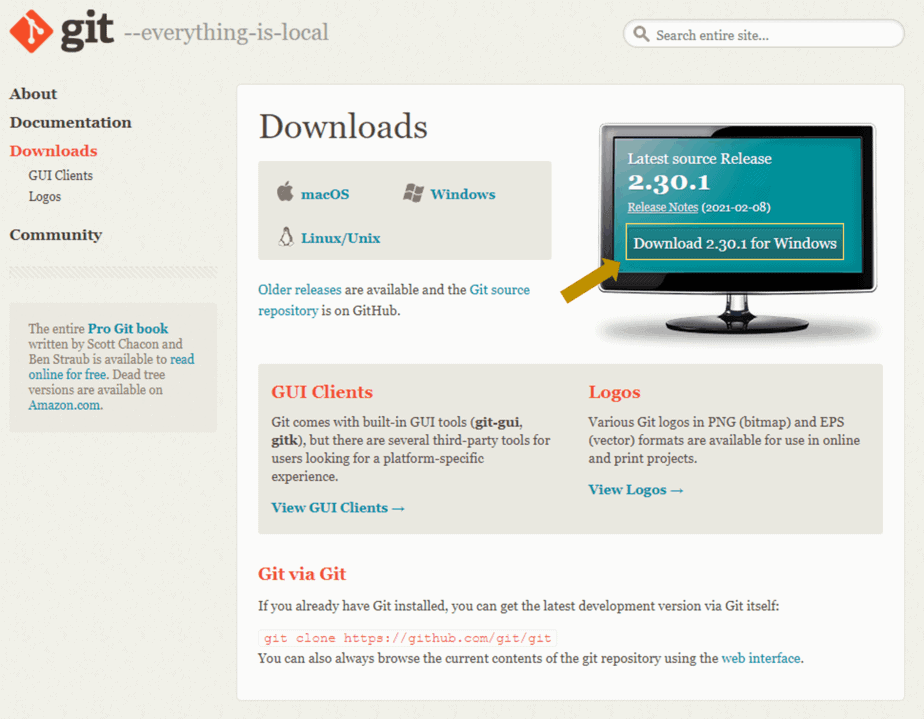
Git is available on all platforms, including Windows, Linux, and Mac, etc. The website will automatically identify that you’re logging in from Windows and point you to the right x64/x86 bit version installer. If you’re working with different Windows architecture, choose the executable accordingly from the Git Source repository.
x64 bit Windows is the most commonly used architecture nowadays. As software requirements have increased, people require more than 4 GB RAM, so they are inclined to use x64 bit architecture.
Run Installer and license
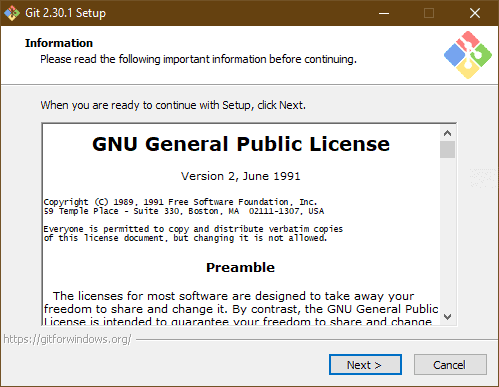
Git is open-source software, giving you the freedom to use the software for commercial and open-source projects. Git license is under the GNU General Public License version 2.0. The Git project chose to use GPLv2 to guarantee your freedom to share and change free software—to make sure the software is free for all its users.
Choose install folder location
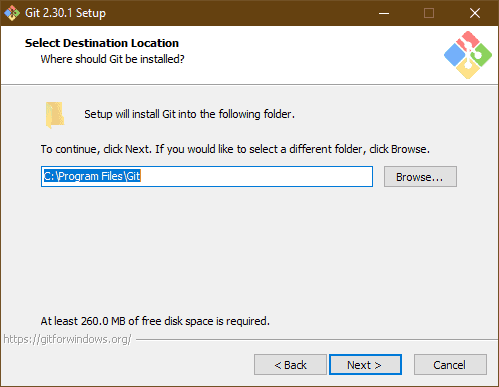
By default, Git will get installed in C drive, i.e., Windows drive. If you want to install Git in a different folder, you can change it from here.
Choose components
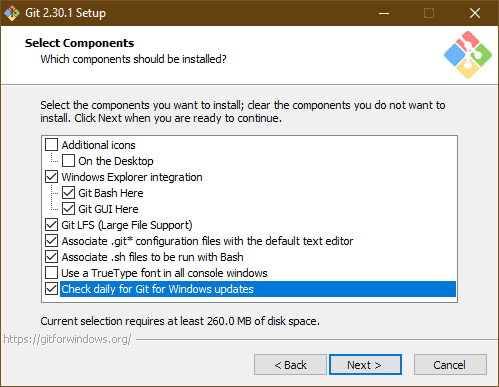
If you want to have file explorer shortcuts for the stock GUI and bash, please select the same. I highly recommend it as they are very much needed when you’re working with Git. Please choose Git LFS, as this will be helpful if you have any large binary files. LFS is slightly different from standard Git operates. It only stores the pointer to the file. The rest of the file is stored in a different server, thereby allowing the Git repository to be more efficient.
Start Menu Shortcut
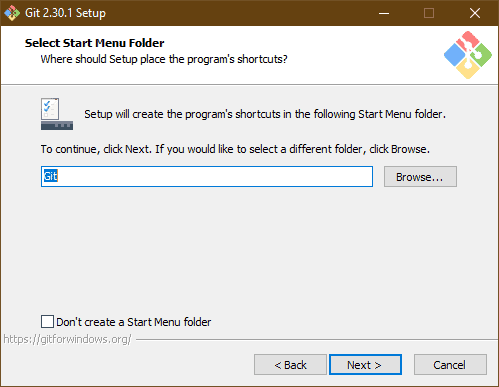
You can choose the name for the Start menu folder, or if you don’t want to create a shortcut in the start menu, you can click on the checkbox and click next.
Git’s Default Editor
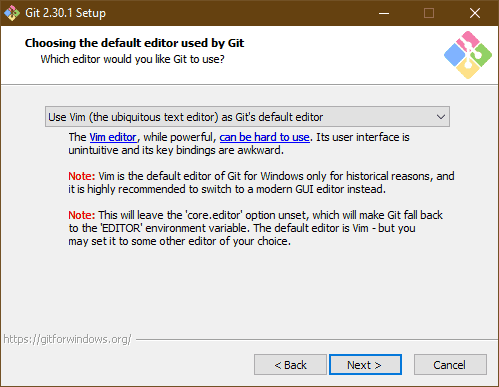
We can choose the default editor, and almost all famous editors are available, like VSCode, etc. By default, it will install Vim editor. Once you select your default editor, then whenever you’re working in Git bash for commit/merge, the chosen editor will open so that you to enter your message.
Default branch name
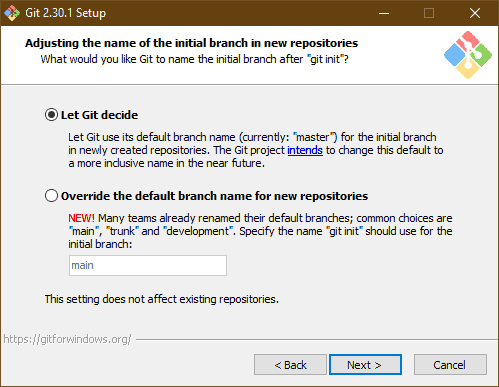
Generally, Git used to have the main branch named as “master,” but due to the “Black Lives Matter” movement, the technical community in support of the campaign has moved away from the “master” keyword. This option is only applicable to new repositories. Old repositories will still have a “master” branch, so you’ll have to update it manually.
Update Environment Path
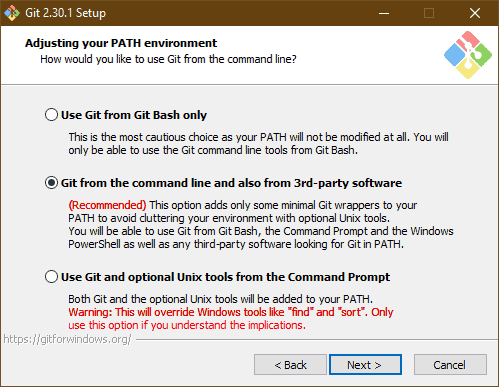
You’ve three options to choose from:
Git from the command line and also from third-party software
If you want to add git to your path, then you can go with this recommended option
Git from GIT Bash only
I don’t recommend this option as we need to work with third-party software like VSCode etc., which require git to be in the Environment path.
Git and optional Unix tools from the command prompt
This can change the default Windows command line functionality, so I don’t recommend this option.
SSH executable
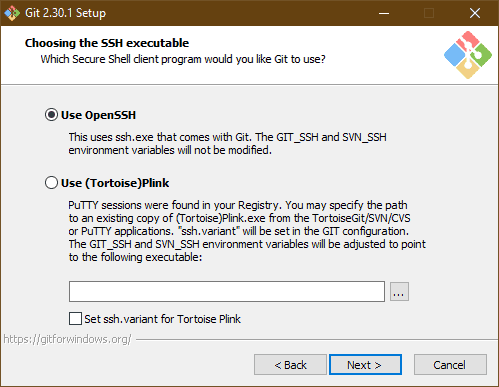
Choose OpenSSH if you’re working with only Git. If you’re working on Tortoise SVN, you’ve to provide the path to Plink.exe From your SVN install location.
HTTPS Transport Backend
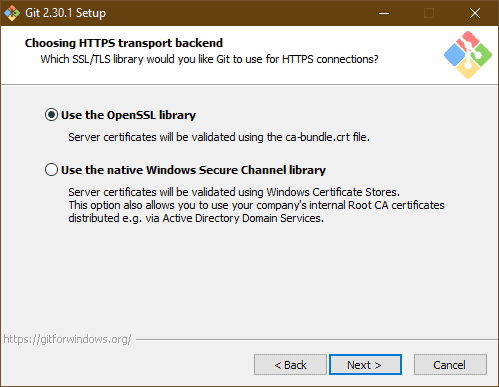
By default, you can choose OpenSSL, but you’re on the Active Directory machine, you can select Native transport.
Line Ending Conversions
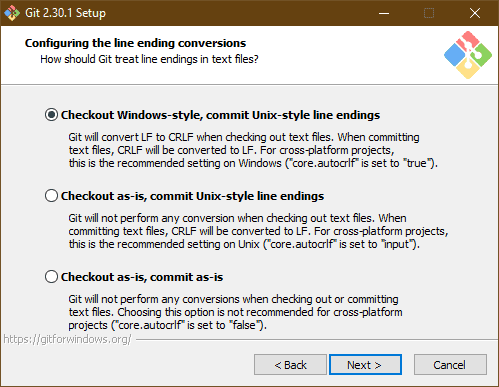
Choosing the line-ending conversion is mostly dependent on the project you’re working on. If you are working on a Windows project, then you can select “Checkout Windows-style, commit Unix-style line endings.”
If you are working on a Linux project, you can tell it to convert the line endings to Unix style while committing and also during checkout.
Or you can choose “Checkout as-is, commit as-is” if your project has both Linux & Windows source files.
Bash emulator
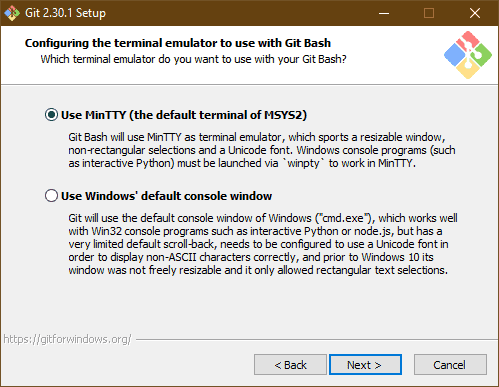
Choose the default option as Windows console has some problems with displaying non-ASCII characters.
Default Pull Behaviour
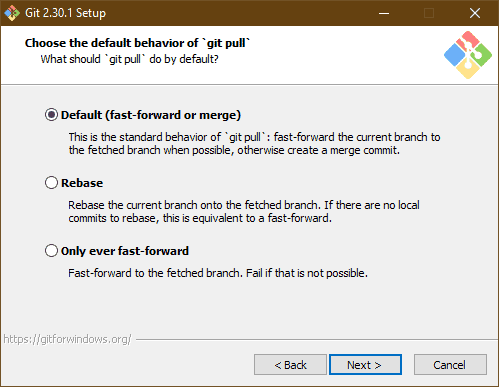
Use the default as it’s the best option to handle merge conflicts. The other options might fail when there is a merge conflict. You’re just changing Pull’s default behavior, but you can explicitly choose the alternatives while pulling.
Credential helper
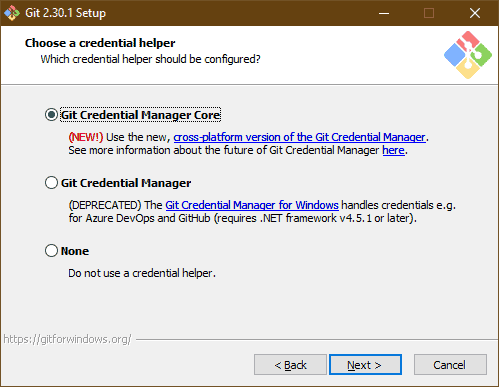
Please select the new Git credential manager core, which is cross-platform. The old Git credential manager is deprecated. It requires Dot Net Framework v4.51 or above.
Extra options
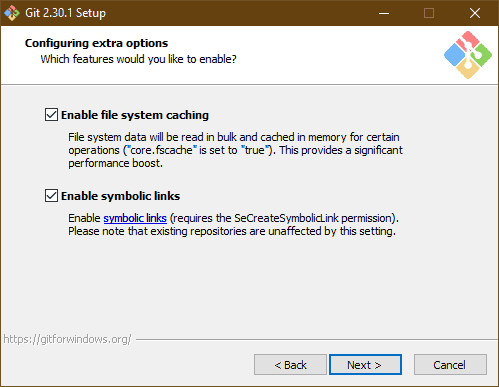
Enable both the extra options, as File system caching can help increase performance significantly. Symbolic links help Git identify & create the shortcuts during checkout. Otherwise, we’ll get the real file instead of the shortcut, and existing projects are unaffected for symbolics links.
Symbolic Link
Git stores the link’s contents (i.e., the path of the file system object that it links to) in a ‘blob’ just like it would for a regular file. It then stores the name, path in the tree object that represents its containing directory.
When you check out a tree containing the link, it restores the object as a symlink regardless of whether the target file system object exists or not.
If you delete the file that the symlink references, it doesn’t affect the Git-controlled symlink in any way. You will have a dangling reference. It is up to the user to either remove or change the link to point to something valid if needed.
Experimental options
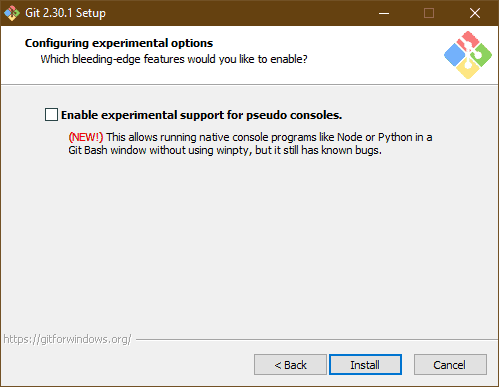
If you want to run Python, NodeJs within Git Bash, you can enable it, but it has some known bugs, so I recommend not to do so.
Conclusion
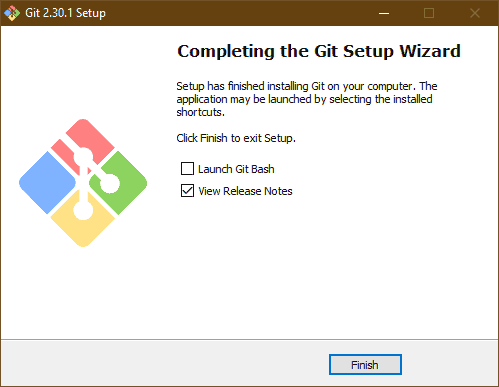
Click on a finish to complete the installation. Before you start working with Git for your projects, you also need to configure your name and email. Typically, you want to configure them globally, so open your command prompt configure them accordingly. Git uses the name and email to identify the author of the commit which you’ll create.
You can configure your username with the below command.
git config –global user.name <name>
You can configure your email with the below command.
git config –global user.email <email>
If you want a specific repository to have a different email/username set it up locally by using –local