
- Published on
Managing Azure Resources with Terraform
- Authors

- Name
- Rahul Neelakantan
This post will explain to you all the prerequisites for using Terraform in managing Azure resources and give you a quick overview of terraform basics for Azure, along with links where you can find more documentation on the topic.
Once you go through this post, you'll have a good understanding of what terraform does and how you can use it in Azure specifically.
What is Terraform?
Terraform is an IaC Tool (Infrastructure as Code) that lets you define both cloud and on-prem resources in human-readable configuration files that you can version, reuse, and share. You can provision and manage all of your infrastructures throughout their lifecycle using terraform.
Does Azure support Terraform?
All major cloud provider support terraform, so yes Azure also supports terraform.
Is Terraform Syntax Cross Compatiable?
This is both a Yes and a No 😀. You can assume that terraform is like a concept but each cloud provider has its own cloud terraform provider. As each cloud provider has unique services with different names etc. An terraform file created for Azure, will not work with AWS as both have different terraform resource names, properties, etc.
But you can mix resources from two different providers in a single terraform script. So if you wanted to create a virtual machine in Azure as well as AWS it's possible with the same Terraform configuration file.
Table of Contents
- Hello World! For Terraform Azure
- Installation of Software required for Terraform Azure
- Logging Into Azure CLI
- Creating HelloWorld.tf
- Working on Azure Resources with Terraform
- Creating Resource with Terraform
- Modifying Resource with Terraform
- Destroying Resource with Terraform
- Importing existing Azure resource to Terraform
- Storing terraform.tfstate file to Azure Storage
- Other useful tips for working with Terraform
- Refreshing your tfstate without changes to cloud resources
- Using input variables with terraform
- Printing out variables with terraform
- Creating seperate terraform configurations for Dev/Staging/Production
- Cloud Shell
- Conclusion
Hello World! For Terraform Azure
Installation of Software required for Terraform Azure
- azure-cli
- terraform
Mac
Installation of Mac is very easy as we have a good package manager called Homebrew. We just need to type in the below commands for installation of the required software.
brew update
brew install azure-cli
brew install terraform
Windows
For windows, you can use a package manager like Chocolatey, which is a free and open-source package management system for Windows. Then, install the Terraform package from the command line.
choco install terraform
Or you can manually install terraform and choose the Amd64 version as most of the OS nowadays runs on x64 architecture.
Also make sure you have installed Azure CLI
Logging Into Azure CLI
Once the installation of azure-cli and terraform is done. You'll need to make sure that you login to azure-cli which can be done using the following command
az login - Will open a prompt to login on browser, once logged in you can close the browser tab
A web browser has been opened at https://login.microsoftonline.com/organizations/oauth2/v2.0/authorize. Please continue the login in the web browser. If no web browser is available or if the web browser fails to open, use device code flow with `az login --use-device-code`.
The following tenants don't contain accessible subscriptions. Use 'az login --allow-no-subscriptions' to have tenant level access.
XXXXXXXX-XXXX-XXXX-XXXX-XXXXXXXXXXXX 'Default Directory'
[
  {
    "cloudName": "AzureCloud",
    "homeTenantId": "XXXXXXXX-XXXX-XXXX-XXXX-XXXXXXXXXXXX",
    "id": "XXXXXXXX-XXXX-XXXX-XXXX-XXXXXXXXXXXX",
    "isDefault": true,
    "managedByTenants": [],
    "name": "XXXXXXXXXXXXX",
    "state": "Enabled",
    "tenantId": "XXXXXXXX-XXXX-XXXX-XXXX-XXXXXXXXXXXX",
    "user": {
      "name": "[email protected]",
      "type": "user"
    }
  }
]
Make sure you note down tenantId it is the most critical field required for Terraform. All the fields are marked with X as they are personal; please make sure you don't share those details with anybody also.
Creating HelloWorld.tf
All terraform files end with an extension of .tf, and you can name your terraform files with any name; there is no restriction to file names. Here we have used main.tf, which is standard practice; it can be named as hello.tf, etc. also.
terraform {
  # Terraform Version
  required_version = "1.1.7"
  required_providers {
    # Azure Terraform Provider
    azurerm = {
      source = "hashicorp/azurerm"
      version = "=2.98.0"
    }
  }
}

# Activating Provider
provider "azurerm" {
 features {}
}
You should first initialize Terraform before you plan to use it. We can do that by terraform init, you should see a similar output as below.
> terraform init

Initializing the backend...

Initializing provider plugins...
- Finding hashicorp/azurerm versions matching "2.98.0"...
- Installing hashicorp/azurerm v2.98.0...
- Installed hashicorp/azurerm v2.98.0 (signed by HashiCorp)

Terraform has created a lock file .terraform.lock.hcl to record the provider
selections it made above. Include this file in your version control repository
so that Terraform can guarantee to make the same selections by default when
you run "terraform init" in the future.

Terraform has been successfully initialized!

You may now begin working with Terraform. Try running "terraform plan" to see
any changes that are required for your infrastructure. All Terraform commands
should now work.

If you ever set or change Terraform's modules or backend configuration,
rerun this command to reinitialize your working directory. If you forget, other
commands will detect it and remind you to do so if necessary.
Now try to run terraform plan to see if you're able to connect to Azure
> terraform plan

No changes. Your infrastructure matches the configuration.

Terraform has compared your real infrastructure against your configuration and found no differences, so no changes are
needed.
Even if you have resources in Azure, terraform will not know anything about it. For terraform to track your azure resources you'lll need to make sure you import it. Terraform tracks everything using a .tfstate file which it keeps locally.
That's it; you've now completed the Hello World program for Terraform. Next up, create a new resource group using terraform, importing and destroying it.
Working on Azure Resources with Terraform
All terraform documentation related to Azure can be found in terraform registry
Before proceeding with creating a resource group you'll need to know/plan two things.
- name of the resource group you'd want to create
- location of the resource group you'd like it to be created.
To know the Azure supported locations and their names you can run the below comamnd
az account list-locations -o table
Azure List of Locations
| DisplayName | Name | RegionalDisplayName |
|---|---|---|
| East US | eastus | (US) East US |
| East US 2 | eastus2 | (US) East US 2 |
| South Central US | southcentralus | (US) South Central US |
| West US 2 | westus2 | (US) West US 2 |
| West US 3 | westus3 | (US) West US 3 |
| Australia East | australiaeast | (Asia Pacific) Australia East |
| Southeast Asia | southeastasia | (Asia Pacific) Southeast Asia |
| North Europe | northeurope | (Europe) North Europe |
| Sweden Central | swedencentral | (Europe) Sweden Central |
| UK South | uksouth | (Europe) UK South |
| West Europe | westeurope | (Europe) West Europe |
| Central US | centralus | (US) Central US |
| North Central US | northcentralus | (US) North Central US |
| West US | westus | (US) West US |
| South Africa North | southafricanorth | (Africa) South Africa North |
| Central India | centralindia | (Asia Pacific) Central India |
| East Asia | eastasia | (Asia Pacific) East Asia |
| Japan East | japaneast | (Asia Pacific) Japan East |
| Jio India West | jioindiawest | (Asia Pacific) Jio India West |
| Korea Central | koreacentral | (Asia Pacific) Korea Central |
| Canada Central | canadacentral | (Canada) Canada Central |
| France Central | francecentral | (Europe) France Central |
| Germany West Central | germanywestcentral | (Europe) Germany West Central |
| Norway East | norwayeast | (Europe) Norway East |
| Switzerland North | switzerlandnorth | (Europe) Switzerland North |
| UAE North | uaenorth | (Middle East) UAE North |
| Brazil South | brazilsouth | (South America) Brazil South |
| Central US (Stage) | centralusstage | (US) Central US (Stage) |
| East US (Stage) | eastusstage | (US) East US (Stage) |
| East US 2 (Stage) | eastus2stage | (US) East US 2 (Stage) |
| North Central US (Stage) | northcentralusstage | (US) North Central US (Stage) |
| South Central US (Stage) | southcentralusstage | (US) South Central US (Stage) |
| West US (Stage) | westusstage | (US) West US (Stage) |
| West US 2 (Stage) | westus2stage | (US) West US 2 (Stage) |
| Asia | asia | Asia |
| Asia Pacific | asiapacific | Asia Pacific |
| Australia | australia | Australia |
| Brazil | brazil | Brazil |
| Canada | canada | Canada |
| Europe | europe | Europe |
| France | france | France |
| Germany | germany | Germany |
| Global | global | Global |
| India | india | India |
| Japan | japan | Japan |
| Korea | korea | Korea |
| Norway | norway | Norway |
| South Africa | southafrica | South Africa |
| Switzerland | switzerland | Switzerland |
| United Arab Emirates | uae | United Arab Emirates |
| United Kingdom | uk | United Kingdom |
| United States | unitedstates | United States |
| United States EUAP | unitedstateseuap | United States EUAP |
| East Asia (Stage) | eastasiastage | (Asia Pacific) East Asia (Stage) |
| Southeast Asia (Stage) | southeastasiastage | (Asia Pacific) Southeast Asia (Stage) |
| Central US EUAP | centraluseuap | (US) Central US EUAP |
| East US 2 EUAP | eastus2euap | (US) East US 2 EUAP |
| West Central US | westcentralus | (US) West Central US |
| South Africa West | southafricawest | (Africa) South Africa West |
| Australia Central | australiacentral | (Asia Pacific) Australia Central |
| Australia Central 2 | australiacentral2 | (Asia Pacific) Australia Central 2 |
| Australia Southeast | australiasoutheast | (Asia Pacific) Australia Southeast |
| Japan West | japanwest | (Asia Pacific) Japan West |
| Jio India Central | jioindiacentral | (Asia Pacific) Jio India Central |
| Korea South | koreasouth | (Asia Pacific) Korea South |
| South India | southindia | (Asia Pacific) South India |
| West India | westindia | (Asia Pacific) West India |
| Canada East | canadaeast | (Canada) Canada East |
| France South | francesouth | (Europe) France South |
| Germany North | germanynorth | (Europe) Germany North |
| Norway West | norwaywest | (Europe) Norway West |
| Switzerland West | switzerlandwest | (Europe) Switzerland West |
| UK West | ukwest | (Europe) UK West |
| UAE Central | uaecentral | (Middle East) UAE Central |
| Brazil Southeast | brazilsoutheast | (South America) Brazil Southeast |
Creating Resource with Terraform
All terraform code can be generalized like below.
Identifier "ProviderTag" "TerraformName" {
 property1 = value1
 property2 = value2
 property3 = value3
 ...
}
Creating an Azure resource group is just three lines below, which is very much self explanatory.
terraform {
  # Terraform Version
  required_version = "1.1.7"
  required_providers {
    # Azure Terraform Provider
    azurerm = {
      source = "hashicorp/azurerm"
      version = "=2.98.0"
    }
  }
}

# Activating Provider
provider "azurerm" {
 features {}
}

resource "azurerm_resource_group" "terraformMyResourceGroup" {
 name = "myResourceGroup"
 location = "eastus"
}
So from the resource group example we can understand the following.
- resource - As this is some resource in cloud which we are refering.
- azure-resource_group - Azure Terraform Provider specific Identifier for Resource Group
- terraformMyResourceGroup - Terraform variable which we planning to define.
And it has some properties like
- name - The resource group name
- location - Location where we want our Resource Group to be created
First we need to run terraform plan to check if this is only resource which is going to be added by terraform.
> terraform plan

Terraform used the selected providers to generate the following execution plan. Resource actions are indicated with the
following symbols:
 + create

Terraform will perform the following actions:

 # azurerm_resource_group.terraformMyResourceGroup will be created
 + resource "azurerm_resource_group" "terraformMyResourceGroup" {
 + id = (known after apply)
 + location = "eastus"
 + name = "myResourceGroup"
 }

Plan: 1 to add, 0 to change, 0 to destroy.

───────────────────────────────────────────────────────────────────────────────────────────────────────────────────────

Note: You didn't use the -out option to save this plan, so Terraform can't guarantee to take exactly these actions if
you run "terraform apply" now.
Next step to run terraform apply, which will now create the resource in your azure account. You'll get a prompt to check if you really want to create this resource. Type in yes and then terraform will do the work of creating the resource group in you azure account.
> terraform apply

Terraform used the selected providers to generate the following execution plan. Resource actions are indicated with the
following symbols:
 + create

Terraform will perform the following actions:

 # azurerm_resource_group.terraformMyResourceGroup will be created
 + resource "azurerm_resource_group" "terraformMyResourceGroup" {
 + id = (known after apply)
 + location = "eastus"
 + name = "myResourceGroup"
 }

Plan: 1 to add, 0 to change, 0 to destroy.

Do you want to perform these actions?
 Terraform will perform the actions described above.
 Only 'yes' will be accepted to approve.

 Enter a value: yes

azurerm_resource_group.terraformMyResourceGroup: Creating...
azurerm_resource_group.terraformMyResourceGroup: Creation complete after 3s [id=/subscriptions/XXXXXXXX-XXXX-XXXX-XXXX-XXXXXXXXXXXX/resourceGroups/myResourceGroup]

Apply complete! Resources: 1 added, 0 changed, 0 destroyed.
Modifying Resource with Terraform
Say you wanted to change the location of your cloud Resource Group to southindia or any location for that matter. Then, it is just of matter of changing this in your code and running terraform apply.
resource "azurerm_resource_group" "terraformMyResourceGroup" {
 name = "myResourceGroup"
 location = "southindia"
}
You can't change some properties for Resource Group like name or location. No problem, terraform will destroy and create that resource with the required property like below. Once you type in yes
> terraform apply
azurerm_resource_group.terraformMyResourceGroup: Refreshing state... [id=/subscriptions/XXXXXXXX-XXXX-XXXX-XXXX-XXXXXXXXXXXX/resourceGroups/myResourceGroup]

Note: Objects have changed outside of Terraform

Terraform detected the following changes made outside of Terraform since the last "terraform apply":

 # azurerm_resource_group.terraformMyResourceGroup has changed
 ~ resource "azurerm_resource_group" "terraformMyResourceGroup" {
 id = "/subscriptions/XXXXXXXX-XXXX-XXXX-XXXX-XXXXXXXXXXXX/resourceGroups/myResourceGroup"
 name = "myResourceGroup"
 + tags = {}
 # (1 unchanged attribute hidden)
 }


Unless you have made equivalent changes to your configuration or ignored the relevant attributes using ignore_changes,
the following plan may include actions to undo or respond to these changes.

───────────────────────────────────────────────────────────────────────────────────────────────────────────────────────

Terraform used the selected providers to generate the following execution plan. Resource actions are indicated with the
following symbols:
-/+ destroy and then create replacement

Terraform will perform the following actions:

 # azurerm_resource_group.terraformMyResourceGroup must be replaced
-/+ resource "azurerm_resource_group" "terraformMyResourceGroup" {
 ~ id = "/subscriptions/XXXXXXXX-XXXX-XXXX-XXXX-XXXXXXXXXXXX/resourceGroups/myResourceGroup" -> (known after apply)
 ~ location = "eastus" -> "southindia" # forces replacement
 name = "myResourceGroup"
 - tags = {} -> null
 }

Plan: 1 to add, 0 to change, 1 to destroy.

Do you want to perform these actions?
 Terraform will perform the actions described above.
 Only 'yes' will be accepted to approve.

 Enter a value: yes

azurerm_resource_group.terraformMyResourceGroup: Destroying... [id=/subscriptions/XXXXXXXX-XXXX-XXXX-XXXX-XXXXXXXXXXXX/resourceGroups/myResourceGroup]
azurerm_resource_group.terraformMyResourceGroup: Still destroying... [id=/subscriptions/XXXXXXXX-XXXX-XXXX-XXXX-XXXXXXXXXXXX/resourceGroups/myResourceGroup, 10s elapsed]
azurerm_resource_group.terraformMyResourceGroup: Still destroying... [id=/subscriptions/XXXXXXXX-XXXX-XXXX-XXXX-XXXXXXXXXXXX/resourceGroups/myResourceGroup, 20s elapsed]
azurerm_resource_group.terraformMyResourceGroup: Still destroying... [id=/subscriptions/XXXXXXXX-XXXX-XXXX-XXXX-XXXXXXXXXXXX/resourceGroups/myResourceGroup, 30s elapsed]
azurerm_resource_group.terraformMyResourceGroup: Still destroying... [id=/subscriptions/XXXXXXXX-XXXX-XXXX-XXXX-XXXXXXXXXXXX/resourceGroups/myResourceGroup, 40s elapsed]
azurerm_resource_group.terraformMyResourceGroup: Still destroying... [id=/subscriptions/XXXXXXXX-XXXX-XXXX-XXXX-XXXXXXXXXXXX/resourceGroups/myResourceGroup, 50s elapsed]
azurerm_resource_group.terraformMyResourceGroup: Still destroying... [id=/subscriptions/XXXXXXXX-XXXX-XXXX-XXXX-XXXXXXXXXXXX/resourceGroups/myResourceGroup, 1m0s elapsed]
azurerm_resource_group.terraformMyResourceGroup: Destruction complete after 1m7s
azurerm_resource_group.terraformMyResourceGroup: Creating...
azurerm_resource_group.terraformMyResourceGroup: Creation complete after 4s [id=/subscriptions/XXXXXXXX-XXXX-XXXX-XXXX-XXXXXXXXXXXX/resourceGroups/myResourceGroup]

Apply complete! Resources: 1 added, 0 changed, 1 destroyed.
Destroying Resource with Terraform
To destroy a resource is just a matter of deleting the code which we had created and then run terraform apply It will see that your current configuration is not having the resource group but is present the .tfstate and also in the subscription account.
Then will plan to delete that resource.
> terraform apply
azurerm_resource_group.terraformMyResourceGroup: Refreshing state... [id=/subscriptions/XXXXXXXX-XXXX-XXXX-XXXX-XXXXXXXXXXXX/resourceGroups/myResourceGroup]

Note: Objects have changed outside of Terraform

Terraform detected the following changes made outside of Terraform since the last "terraform apply":

 # azurerm_resource_group.terraformMyResourceGroup has changed
 ~ resource "azurerm_resource_group" "terraformMyResourceGroup" {
 id = "/subscriptions/XXXXXXXX-XXXX-XXXX-XXXX-XXXXXXXXXXXX/resourceGroups/myResourceGroup"
 name = "myResourceGroup"
 + tags = {}
 # (1 unchanged attribute hidden)
 }


Unless you have made equivalent changes to your configuration or ignored the relevant attributes using ignore_changes,
the following plan may include actions to undo or respond to these changes.

───────────────────────────────────────────────────────────────────────────────────────────────────────────────────────

Terraform used the selected providers to generate the following execution plan. Resource actions are indicated with the
following symbols:
 - destroy

Terraform will perform the following actions:

 # azurerm_resource_group.terraformMyResourceGroup will be destroyed
 # (because azurerm_resource_group.terraformMyResourceGroup is not in configuration)
 - resource "azurerm_resource_group" "terraformMyResourceGroup" {
 - id = "/subscriptions/XXXXXXXX-XXXX-XXXX-XXXX-XXXXXXXXXXXX/resourceGroups/myResourceGroup" -> null
 - location = "southindia" -> null
 - name = "myResourceGroup" -> null
 - tags = {} -> null
 }

Plan: 0 to add, 0 to change, 1 to destroy.

Do you want to perform these actions?
 Terraform will perform the actions described above.
 Only 'yes' will be accepted to approve.

 Enter a value: yes

azurerm_resource_group.terraformMyResourceGroup: Destroying... [id=/subscriptions/XXXXXXXX-XXXX-XXXX-XXXX-XXXXXXXXXXXX/resourceGroups/myResourceGroup]
azurerm_resource_group.terraformMyResourceGroup: Still destroying... [id=/subscriptions/XXXXXXXX-XXXX-XXXX-XXXX-XXXXXXXXXXXX/resourceGroups/myResourceGroup, 10s elapsed]
azurerm_resource_group.terraformMyResourceGroup: Still destroying... [id=/subscriptions/XXXXXXXX-XXXX-XXXX-XXXX-XXXXXXXXXXXX/resourceGroups/myResourceGroup, 20s elapsed]
azurerm_resource_group.terraformMyResourceGroup: Still destroying... [id=/subscriptions/XXXXXXXX-XXXX-XXXX-XXXX-XXXXXXXXXXXX/resourceGroups/myResourceGroup, 30s elapsed]
azurerm_resource_group.terraformMyResourceGroup: Still destroying... [id=/subscriptions/XXXXXXXX-XXXX-XXXX-XXXX-XXXXXXXXXXXX/resourceGroups/myResourceGroup, 40s elapsed]
azurerm_resource_group.terraformMyResourceGroup: Still destroying... [id=/subscriptions/XXXXXXXX-XXXX-XXXX-XXXX-XXXXXXXXXXXX/resourceGroups/myResourceGroup, 50s elapsed]
azurerm_resource_group.terraformMyResourceGroup: Still destroying... [id=/subscriptions/XXXXXXXX-XXXX-XXXX-XXXX-XXXXXXXXXXXX/resourceGroups/myResourceGroup, 1m0s elapsed]
azurerm_resource_group.terraformMyResourceGroup: Still destroying... [id=/subscriptions/XXXXXXXX-XXXX-XXXX-XXXX-XXXXXXXXXXXX/resourceGroups/myResourceGroup, 1m10s elapsed]
azurerm_resource_group.terraformMyResourceGroup: Still destroying... [id=/subscriptions/XXXXXXXX-XXXX-XXXX-XXXX-XXXXXXXXXXXX/resourceGroups/myResourceGroup, 1m20s elapsed]
azurerm_resource_group.terraformMyResourceGroup: Destruction complete after 1m23s

Apply complete! Resources: 0 added, 0 changed, 1 destroyed.
Importing existing Azure resource to Terraform
Say you've created a resource group already in Azure, but how will terraform know about that. Terraform will only track resources that are present in tfstate file. So if you don't have the resource in tfstate file then terraform doesn't know about it.
So even if you create the resource group with the same name as the resource group you have in your Azure account. It will still try to create that resource group.
resource "azurerm_resource_group" "existingResourceGroup" {
 name = "existing-resource-group"
 location = "eastus"
}
terraform import will import the actual resource to terraform state. You can import your existing resource group with below command.
terraform import azurerm_resource_group.existingResourceGroup /subscriptions/XXXXXXXX-XXXX-XXXX-XXXX-XXXXXXXXXXXX/resourceGroups/existing-resource-group
Here existingResourceGroup is the terraform variable and existing-resource-group is the actual resource group name present in the Azure.
Once this is done, we can run terraform plan to see if there are any changes, mostly when you're importing you wouldn't want to do changes to your imported resource. Terraform will nicely show all the differences if any between your current state and existing resource.
These difference in state is mainly due to missing properties in your terraform configuration file (main.tf, etc.)
Storing terraform.tfstate file to Azure Storage
Suppose you have just started working with terraform. In that case, you'll need to be very clear with the concept that the terraform.tfstate file holds all the resouces which are handled by terraform. But this file is local, so if you're planning to create the repository you'll need to commit this file otherwise, terraform will lose all of its state i.e. you'll need to import all resources again to terraform.tfstate file again, which is tedious and error prone.
But adding tfstate file to git poses a risk because all passwords and ids of the resources are stored in plain text format. So anyone having access to the git repository can find out the sensitive information about your resources.
For this reason the Azure cloud provider has built an option to store the tfstate file inside Azure storage.
Its always better to keep a seperate resource group, storage account & container for terraform, so that we don't have to change it in case we want to drop or modify our resources which our application is using.
So here is the code to create a resource group, storage account and a container for terraform tfstate.
resource "azurerm_resource_group" "tfstate" {
 name = "tfstate"
 location = "eastus"
}

resource "azurerm_storage_account" "tfstate" {
 name = "xxxtfstate"
 resource_group_name = azurerm_resource_group.tfstate.name
 location = azurerm_resource_group.tfstate.location
 account_tier = "Standard"
 account_replication_type = "LRS"
 allow_blob_public_access = true
}

resource "azurerm_storage_container" "tfstate" {
 name = "tfstate"
 storage_account_name = azurerm_storage_account.tfstate.name
 container_access_type = "private"
}
Azure Storage Account name is global i.e. it needs to be unique globally, so you'll need to replace xxxtfstate with something which is unique globally.
Now that you've updated your tf file, you'll need to run terraform plan to check what terraform is planning to do and then terraform apply to create your resources.
Next step is to update your terraform configuration in the start of your main.tf or any terraform file where you've defined your azure provider, etc.
terraform {
 required_version = "1.1.7"
 required_providers {
  azurerm = {
    source = "hashicorp/azurerm"
    version = "=2.98.0"
  }
  random = {
    source = "hashicorp/random"
    version = "=3.1.0"
  }
 }
 backend "azurerm" {
  resource_group_name = "tfstate"
  storage_account_name = "xxxtfstate"
  container_name = "tfstate"
  key = "test.terraform.tfstate"
 }
}

provider "azurerm" {
 features {}
}
key = "test.terraform.tfstate" this blob will be created in the container, also make sure to replace storage_account_name = "xxxtfstate" with the storage account name you've created.
Other useful tips for working with Terraform
Now i'll discuss the other commands that are very much needed while working with Terraform on Azure resources.
Refreshing your tfstate without changes to cloud resources
Normally terraform workflow suggests that all changes to your infrastructure should be managed by terraform only. But that might not be easy always, sometimes its easier to update using Azure portal (UI), for example adding tags to your resources, etc.
Say you do this change and then come back to your terraform directory and run terraform plan, terraform will notice that there are some changes that have happened and then it will try of overwrite it again. So all our hard work of doing it in UI goes to waste.
For this purpose, terraform has a feature to just refresh its state as per acutal resource state. So you should just run terraform apply -refresh-only this will only update your terraform state and will not do any changes to your Azure resources.
One more command called terraform refresh has been deprecated, so it might not be available in future versions.
Using input variables with terraform
You can even define variables in terraform; below is the syntax for creating a variable. As you've defined default the terraform will not ask you for value when running terraform apply. You'll need to explicitly define the variable in terraform command line with -var '<input-variable-name>=<value>' for example -var 'testVariable=staging'
variable "testVariable" {
 type = string
 default = "test"
}
Printing out variables with terraform
You can print out properties from existing & new terraform resources. For example, say you wanted to know the id of the storage container, etc. You can do this using output; see the example below.
output "tfstate-id" {
 value = azurerm_storage_container.tfstate.id
}
You can refer more on this in the official document.
Creating seperate terraform configurations for Dev/Staging/Production
Terraform typically manages everything in the state file. Lets say you plan to add all your resources in terraform and then suddenly you're project grows in size and you'll have to manage UI, Backend, etc.
So you're doing some changes in UI, and you're not yet ready to apply those changes to real environment. But suddenly, you'll need to do some changes to the Backend infrastructure. You either have to undo those changes you've done to UI or complete the changes and then apply both of them together.
This can become quite problematic, so it's always better to separate logical infrastructure setups to separate folders.
That is the reason why you'll need to create separate folders for Dev/Staging & Production.
Cloud Shell
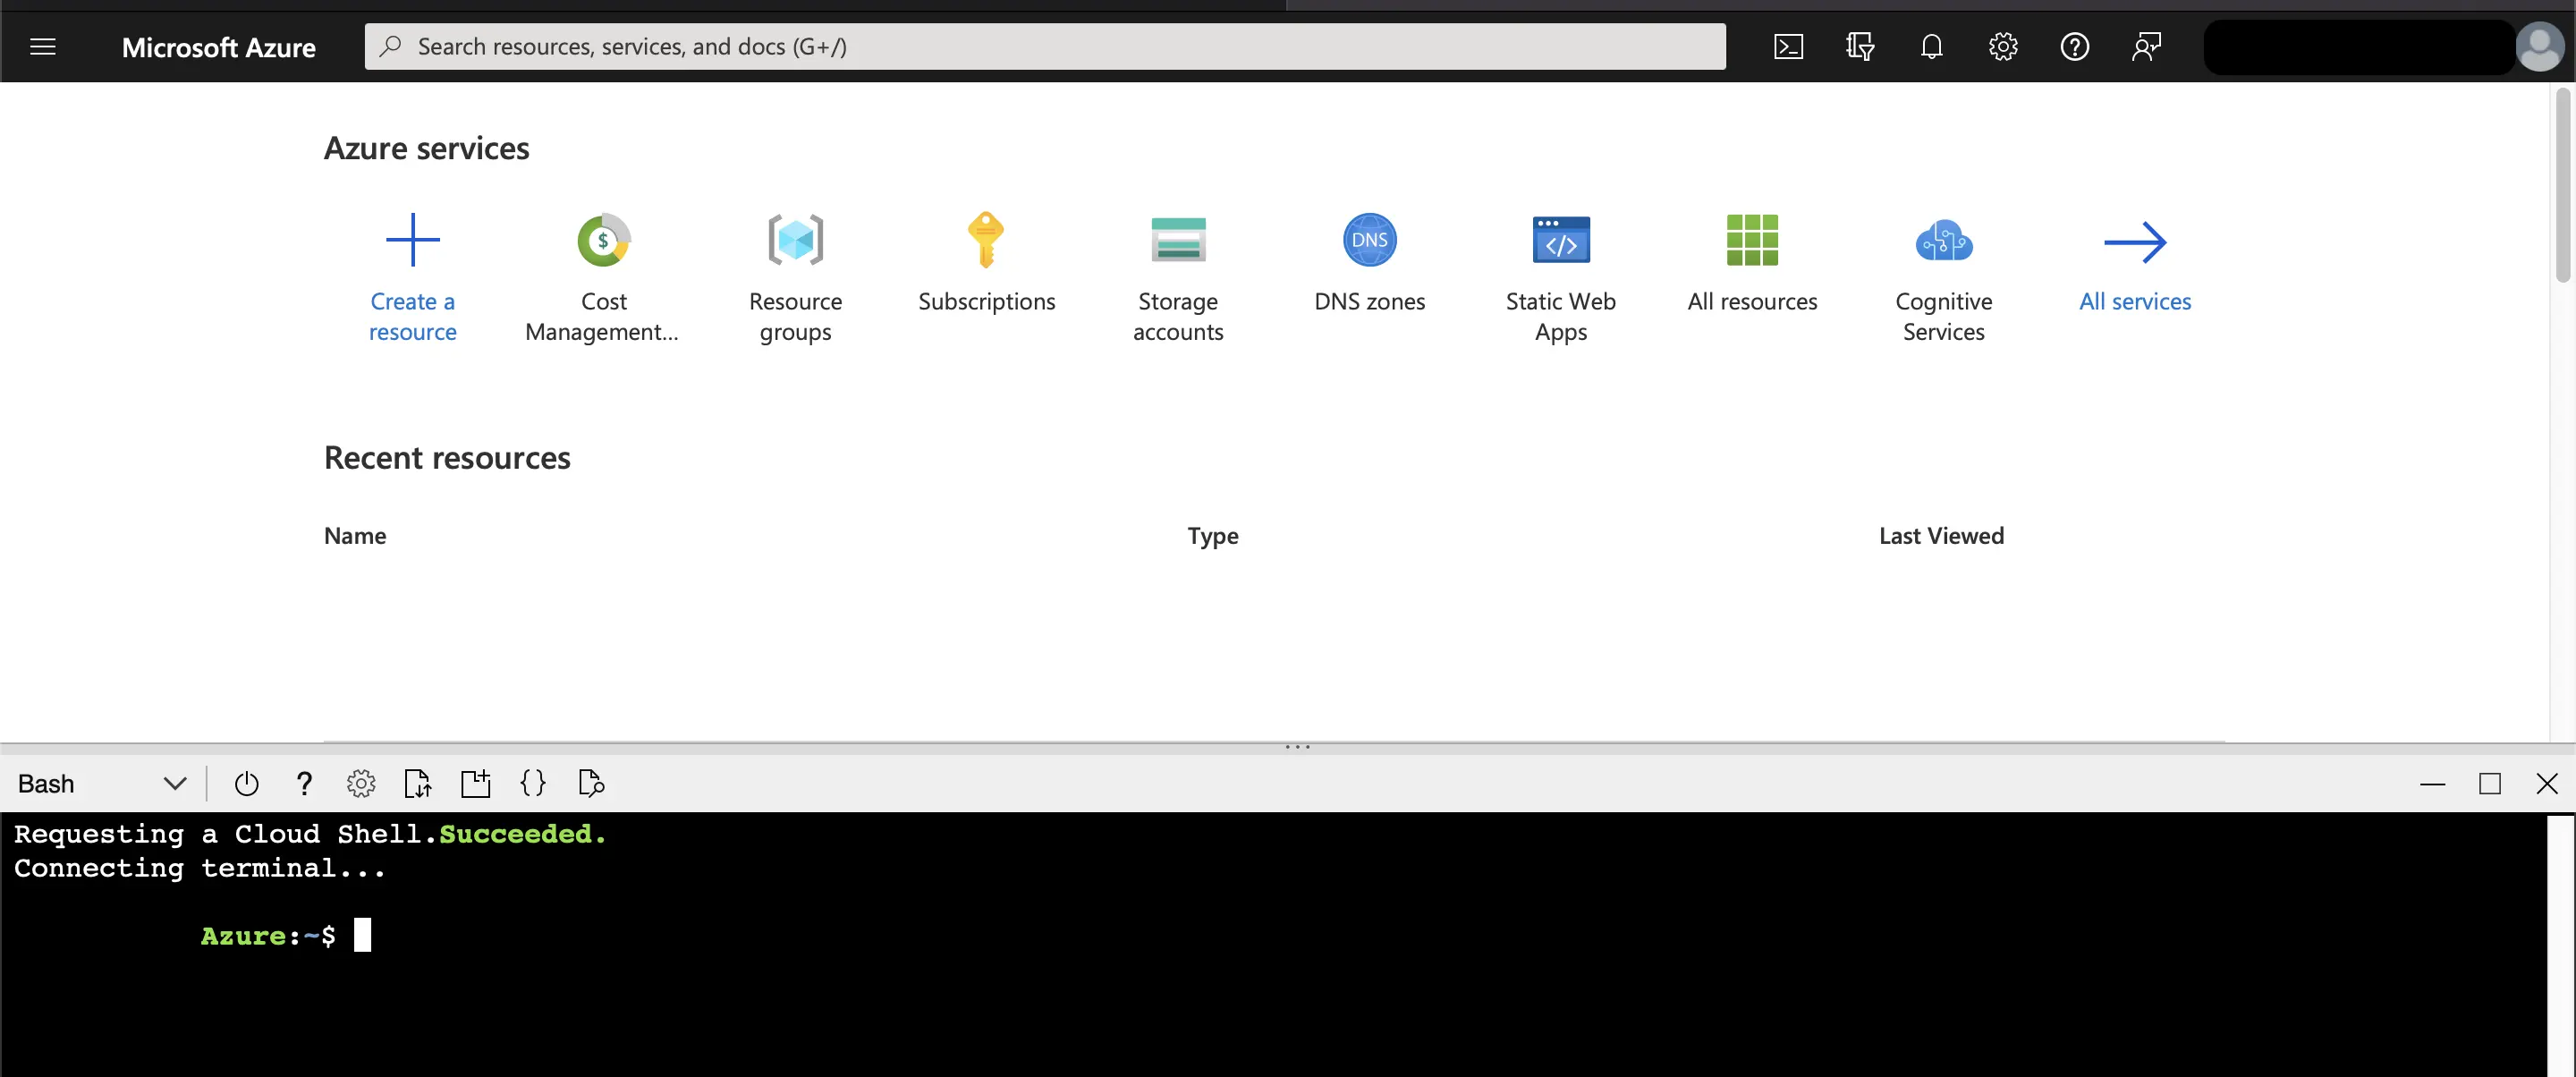
Terraform is installed in Bash in Cloud Shell by default. Cloud Shell automatically authenticates your default Azure CLI subscription to deploy resources through the Terraform Azure modules. To enable cloud shell, please follow the below steps.
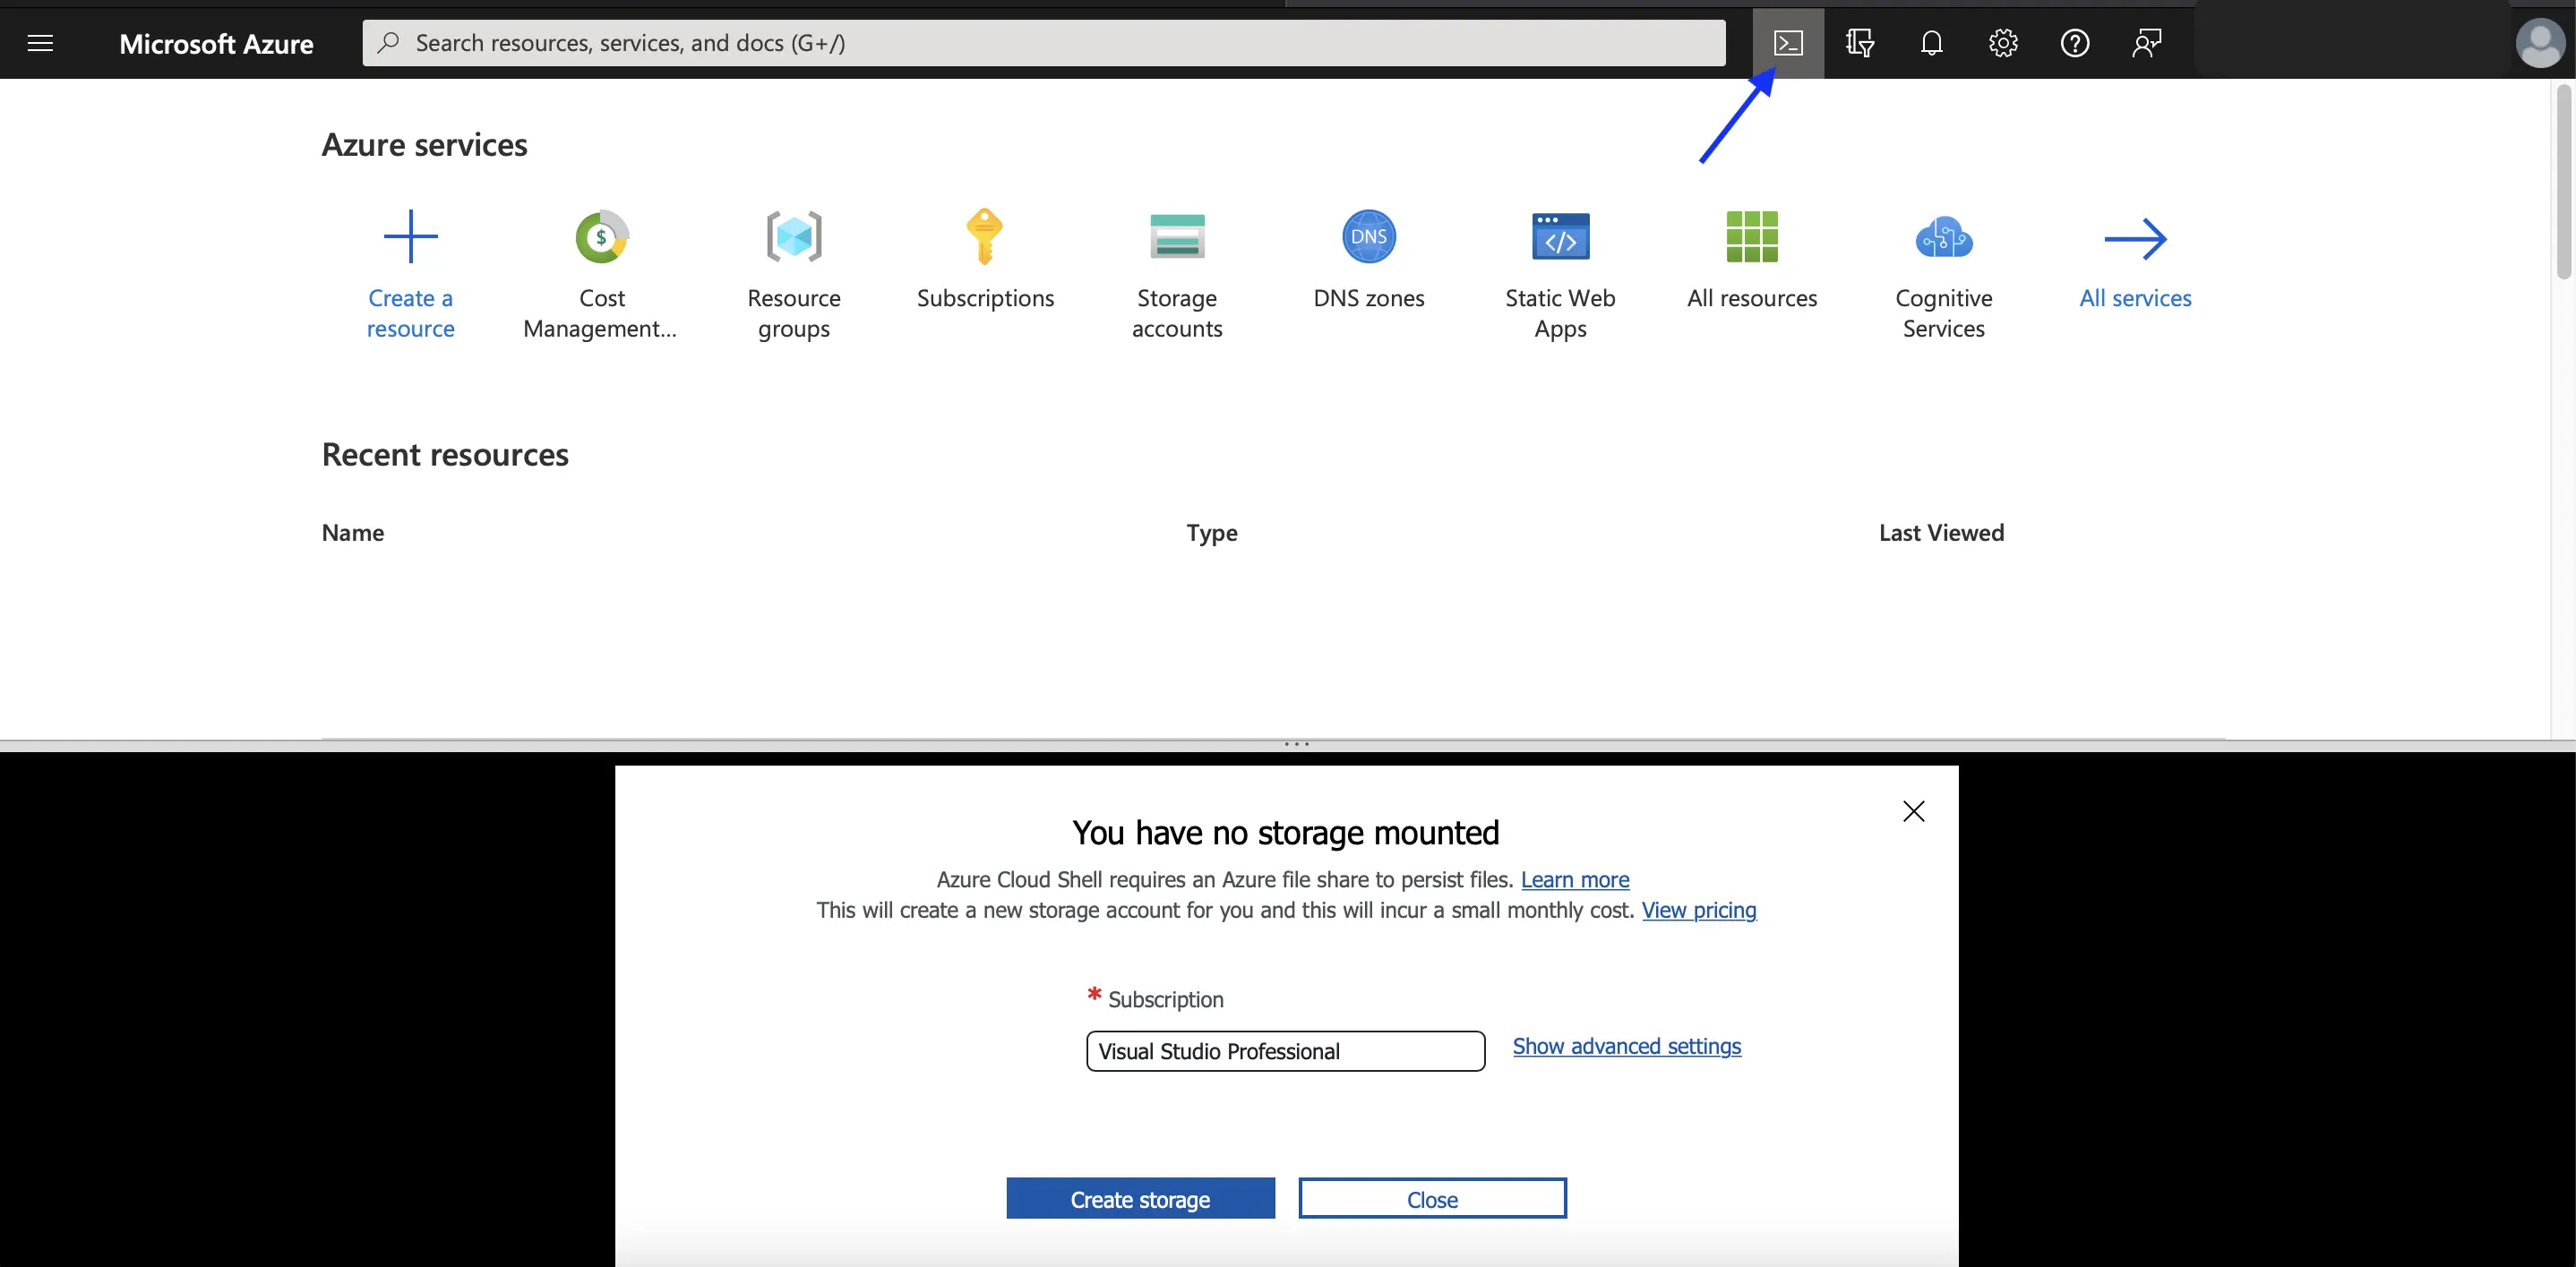
First, go to portal.azure.com and click the console-like icon on the top right. Once you click on the same, a window will appear saying no storage mounted for cloud shell.
Cloud Shell requires a storage account and some files in a shared drive, which will take about 5 GB of space, which is why additional costing.
Once you click on Create, it will create a separate resource group and storage account, which you can later delete if not required.
Conclusion
Hope this post has given a good understanding of what is terraform and how you make use of it in managing resources in cloud, etc.
Please keep the official docs listed below as bookmarks so that you can refer to them whenever needed.